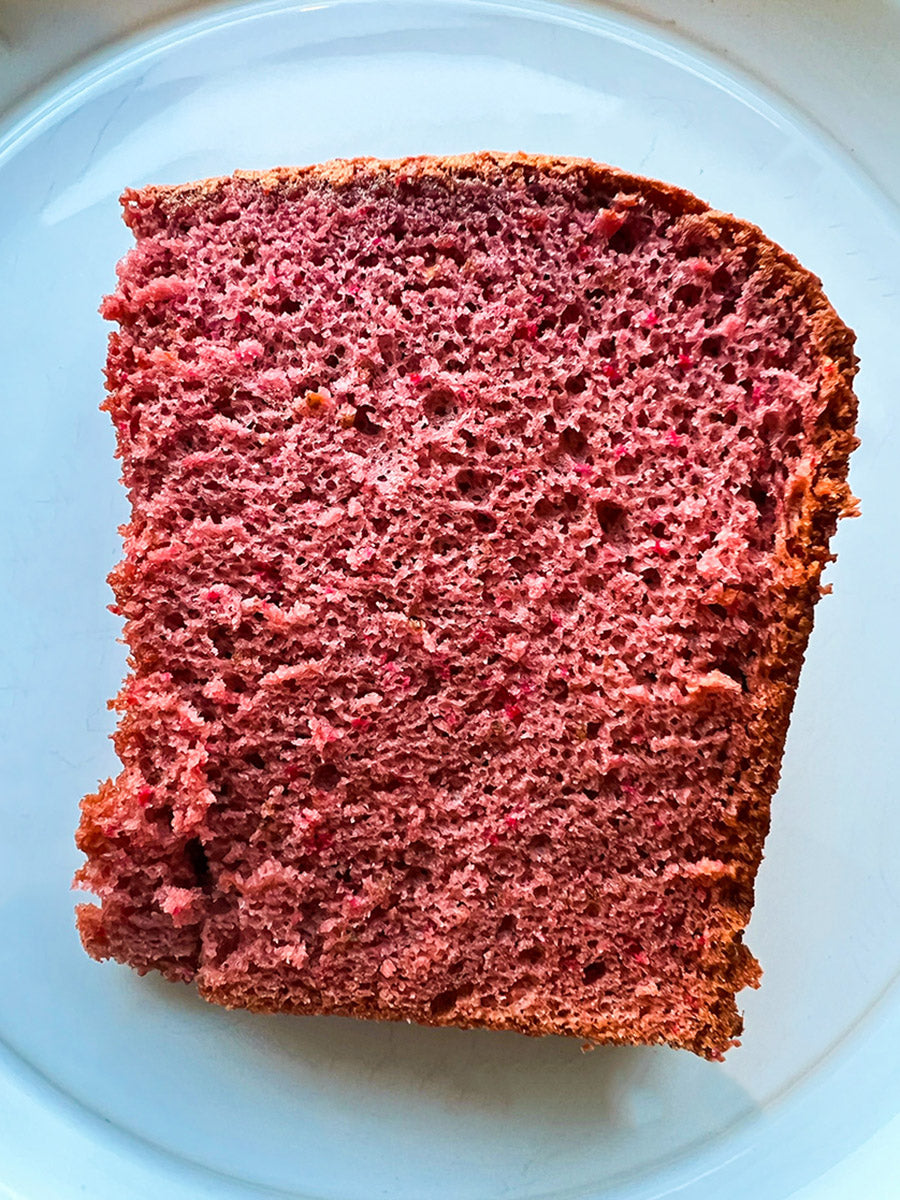
We had a whole pound of gorgeous, fresh strawberries and I promised my oldest daughter I'd make her a strawberry cake while she was at school. Ultimately, I decided to go with a sponge cake! I was inspired by our delicious vegan strawberry cupcakes, this banana sponge cake, and my mom's Passover sponge cake—does this mean I'm in my sponge cake era now? It's hard not to be with results this good. The sponge is just a blank canvas, ready to take on new flavors and colors with its perfect texture. And while the daughter I made the cake for wasn't a fan, her sister was, so I'm calling it a win.
Ingredients
8 large eggs
1 lb. fresh strawberries
½ cup avocado oil
1/2 teaspoon salt
2 teaspoons vanilla
1 teaspoon baking soda
1 teaspoon baking powder
1¾ cup sugar
Red food coloring, optional
2 cups flour
Directions
Preheat the oven to 325°F.
Hull the strawberries and add them to a blender. Pulse until smooth.
Carefully separate the eggs, placing the egg yolks in one bowl and whites in another.
Combine the yolks and strawberry purée with a hand mixer until smooth.
Add the avocado oil, salt, vanilla, baking soda, baking powder, and sugar, and mix again until smooth. If you want, add a little red food coloring here to brighten the natural strawberry color.
Slowly add the flour and mix again until no streaks remain.
Wash the beaters and beat the egg whites on high until they form stiff peaks. (The peak should be able to stand straight when you lift it out of the bowl.)
Fold the batter into the egg whites carefully, so you don’t deflate it too much (this is what will help it rise).
Pour the batter into an ungreased, 10-inch tube pan (like what you would bake angel food cake in) and bake for 60-65 minutes, until the cake springs back when you press it lightly.
Once you remove it from the oven, invert the cake in the pan over a tea towel on the counter. Let cool.
Flip the cake over and run a knife or offset spatula around the edges so the sides release. Remove the cake from the pan and slice to serve.
We selected these products because we love them, and hope you do too. Baked by Melissa has an affiliate relationship, so we may get a commission if you purchase something through our links. Items are sold by the retailer, not Baked by Melissa.