Magic Blondie Bars
Posted: | Categories: Recipes | Tags:brownies & blondies dessert kid-friendly
Magic Blondie Bars
Rated 5.0 stars by 1 users
Category
Sweet Recipes
Author:
Melissa Ben-Ishay
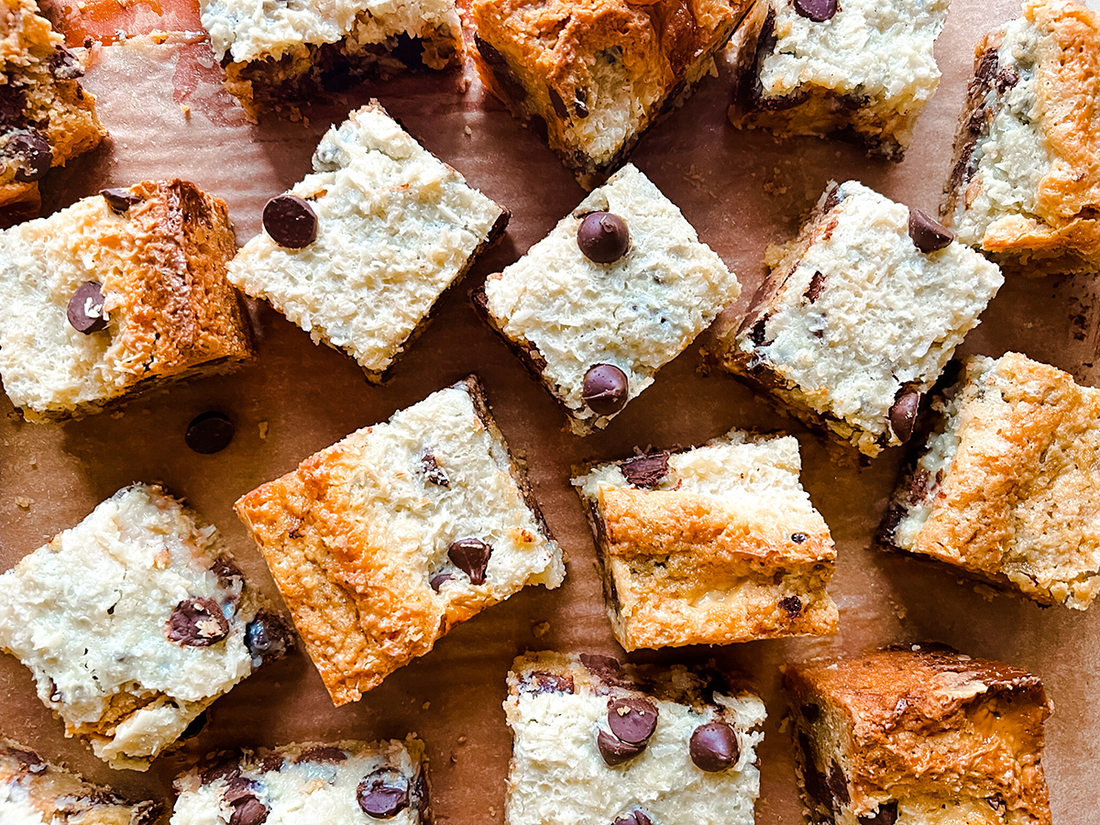
Magic Bars—you know, the classic recipe where you layer a bunch of ingredients on top of each other in a pan—never cease to amaze me. I love that you can add all of those delicious ingredients to a pan, pop them in the oven, and end up with a delightful cookie filled with so many mouthwatering flavors. But this recipe takes it one step further—I added all those ingredients on top of my blondie recipe for the most delicious dessert you could ever dream of. Seriously,these are magic bars.

Ingredients
- 1 1/2 sticks unsalted butter, softened
- 1 cup packed light brown sugar
- 1/2 cup granulated sugar
- 1 egg and 1 egg yolk
- 2 teaspoons vanilla
- 1 1/2 cups all-purpose flour
- 1/2 teaspoon salt, plus more for sprinkling
- 1 teaspoon baking powder
- 2 cups dark chocolate chips, divided (feel free to sub with your favorite chocolate or butterscotch)
- 2/3 cup peanut butter, melted slightly so it's spreadable
- 1 - 14 oz. can sweetened condensed milk
- 1/2 cup unsweetened shredded coconut
Directions
- Preheat the oven to 350F.
- Beat the butter until creamy. Add the sugars and beat on medium-high until light and fluffy, about 3-5 minutes.
- Add the egg, egg yolk, and vanilla and mix again to combine.
- With the mixer on low, add the flour, baking powder, and salt, just until combined.
- Stir in 1 cup chocolate chips.
- Line an 8x8 baking pan with cooking spray and spread the dough into an even layer.
- Spread the peanut butter over the dough and sprinkle with 1 cup chocolate chips
- Drizzle the condensed milk over the chocolate chips evenly.
- Sprinkle with salt.
- Add the coconut over the top in an even layer and add a few more chocolate chips. Bang the pan a couple times on a wooden surface to even everything out.
- Bake for 45 minutes, until the edges are golden and the middle starts to brown on top. Cool completely before slicing.
What You'll Need
What You’ll Need
We selected these products because we love them, and hope you do too. Baked by Melissa has an affiliate relationship, so we may get a commission if you purchase something through our links. Items are sold by the retailer, not Baked by Melissa.

Get to know our one-of-a-kind founder & CEO, Melissa Ben-Ishay, right from the source.
